
Healthcare institution user guide
For hospitals, clinics, laboratories and other health facilities. Follow the steps in order. You can stop and come back at any time.
1. Open the website
- Open your browser (Chrome, Safari, Firefox or Edge).
- Type biomedical.africamedicalmarketplace.com in the address bar and press Enter.
- Press Create account at the top right.
2. Register your institution
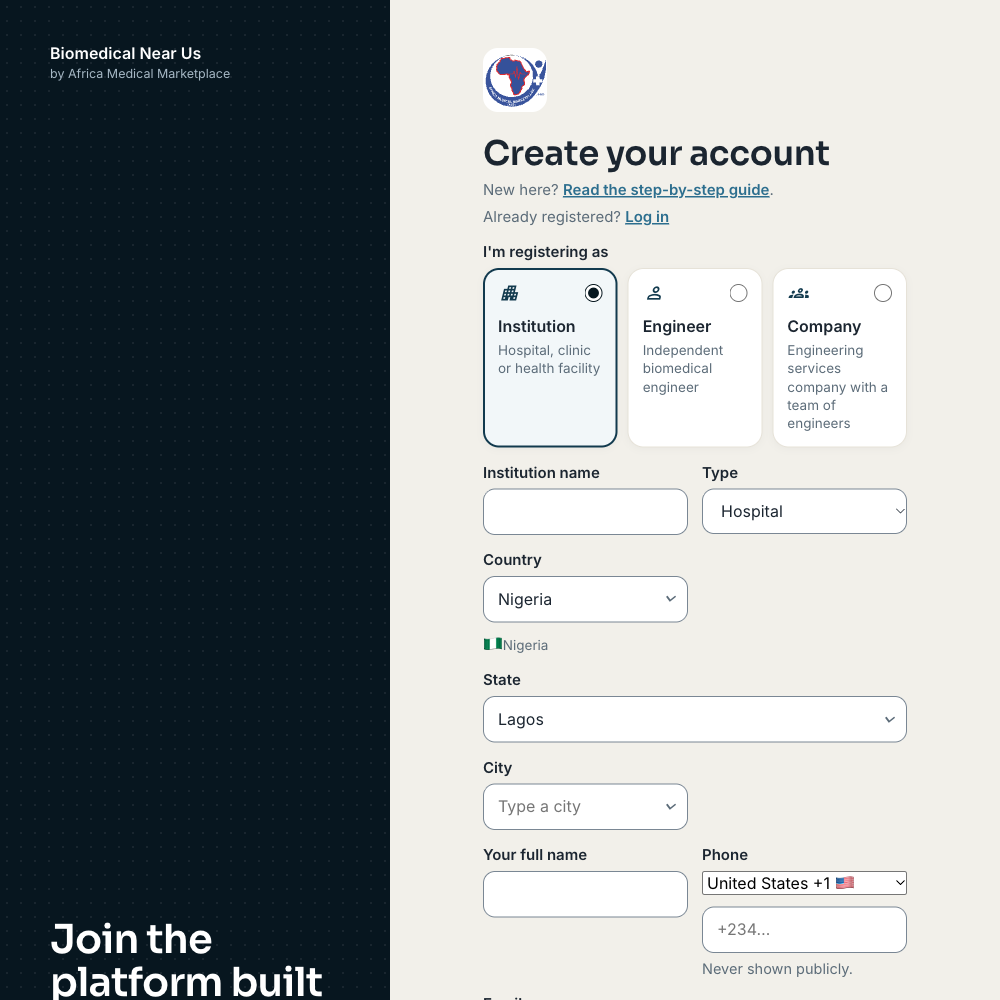
- Under I'm registering as, choose Institution (Hospital, clinic or health facility).
- Write the Institution name and choose its Type: Hospital, Clinic, Laboratory or Other health facility.
- Choose the Country. A flag appears under it. If it is Nigeria, choose the State (all 36 states and the FCT are in the list), then the City.
- Write Your full name (you become the institution's administrator), your Phone and your Email. They are never shown publicly.
- Choose a Password of at least 12 characters.
- Tick I agree to the terms and privacy policy, then press Create account.
3. The AMP team checks your institution
The AMP team checks every new institution before it is verified. You will get a notification (the bell at the top shows a number) when they decide, or if they need more from you. Institutions are not shown in a public list. Engineers only see your institution's name when it matters for your service request.
4. Complete your details
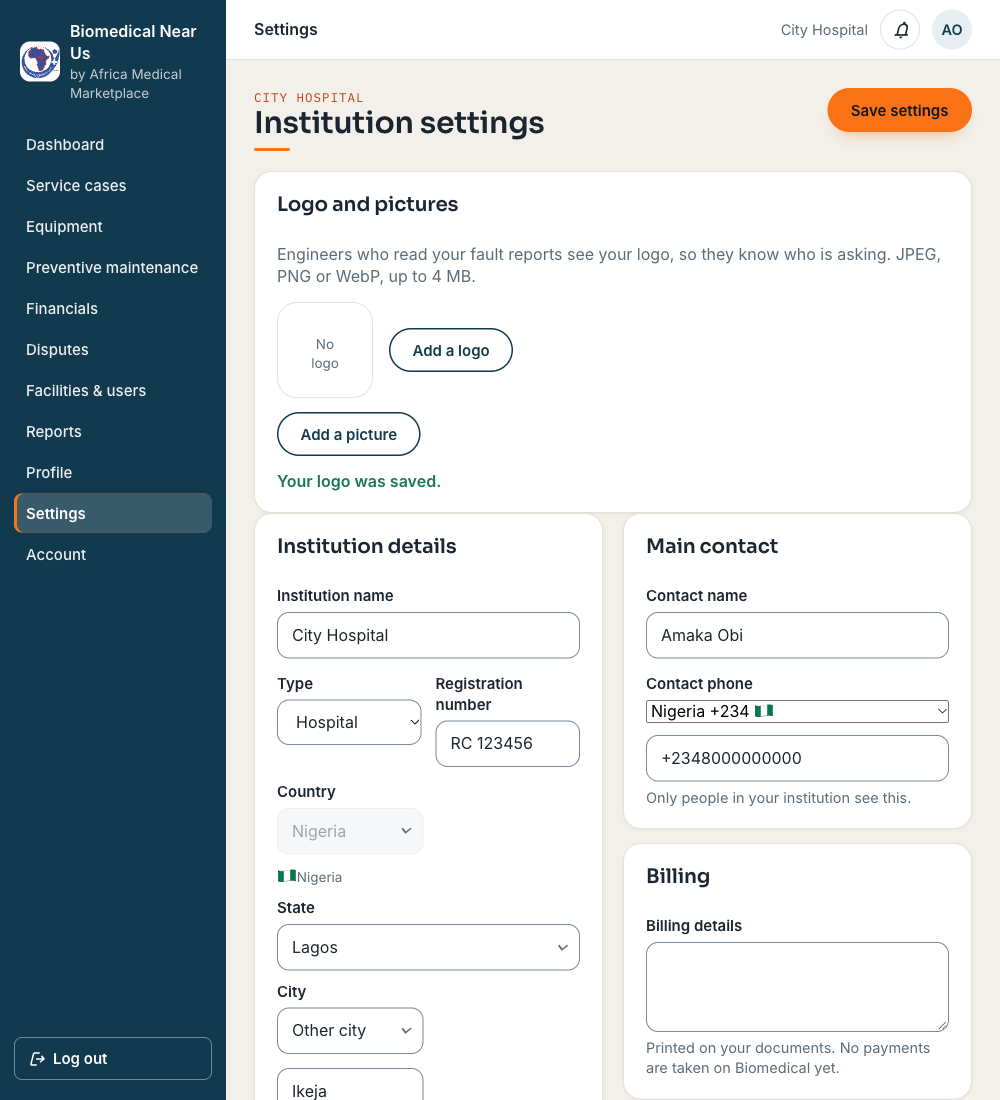
- Open Settings in the menu.
- Under Institution details check the Institution name, Type and Registration number. Choose your State and City. The country cannot be changed after registration. If you need to change it, contact support.
- Optional: under Map position press Use my current location while you are at the facility, or type the latitude and longitude. Only your administrators and the platform administrators see it.
- Write a short About text.
- Under Main contact write the Contact name and Contact phone of the person engineers should expect.
- Under Billing write the Billing details that should appear on documents.
- Press Save settings.
5. Ask for an engineer
- Open Service cases, then press Report a fault.
- Describe what is wrong, choose the equipment and add up to six photos with Add photos.
- Press Report fault. Engineers whose area covers your site see the case and say they are interested.
- Compare them and choose one. The case page then shows each step until the work is done.
Keep a list of your machines under Equipment and plan regular servicing under Preventive maintenance.
6. Find an engineer and send an enquiry
- On your Dashboard, the card Engineers for you shows engineers near you. Each one says why it is suggested. Choose a kind of work, or tick Anywhere in my country to see more.
- To look at everyone, press Search all engineers or use Find an engineer and filter by country, state, city and kind of work.
- Open an engineer's page. Press Send an enquiry, write what you need and press Send enquiry. Your phone number and e-mail are not shared: you talk on the platform.
- Press Save to my list on an engineer you may want later. Everyone in your institution sees the list under Saved engineers.
- Open Enquiries in the menu to read the answers and write back. Press Close this enquiry when you are finished.
7. Add your colleagues
Open Facilities & users. There you can add a facility or department and invite colleagues. Each invitation has a link, which is also e-mailed when possible. Your colleague opens it, creates their own account and joins your institution. Only an administrator of the institution can invite people.
8. Change your details later
Only an administrator of the institution can change its details, from Settings. To change your own password or e-mail, open Account.
Stuck? Read the questions and answers or contact support.