
Biomedical and clinical engineer user guide
Follow the steps in order. Each step is short. You can stop at any time and come back later.
1. Open the website
- Open your phone or computer browser (Chrome, Safari, Firefox or Edge).
- Type biomedical.africamedicalmarketplace.com in the address bar at the top and press Enter.
- Press Create account at the top right.
2. Create your account
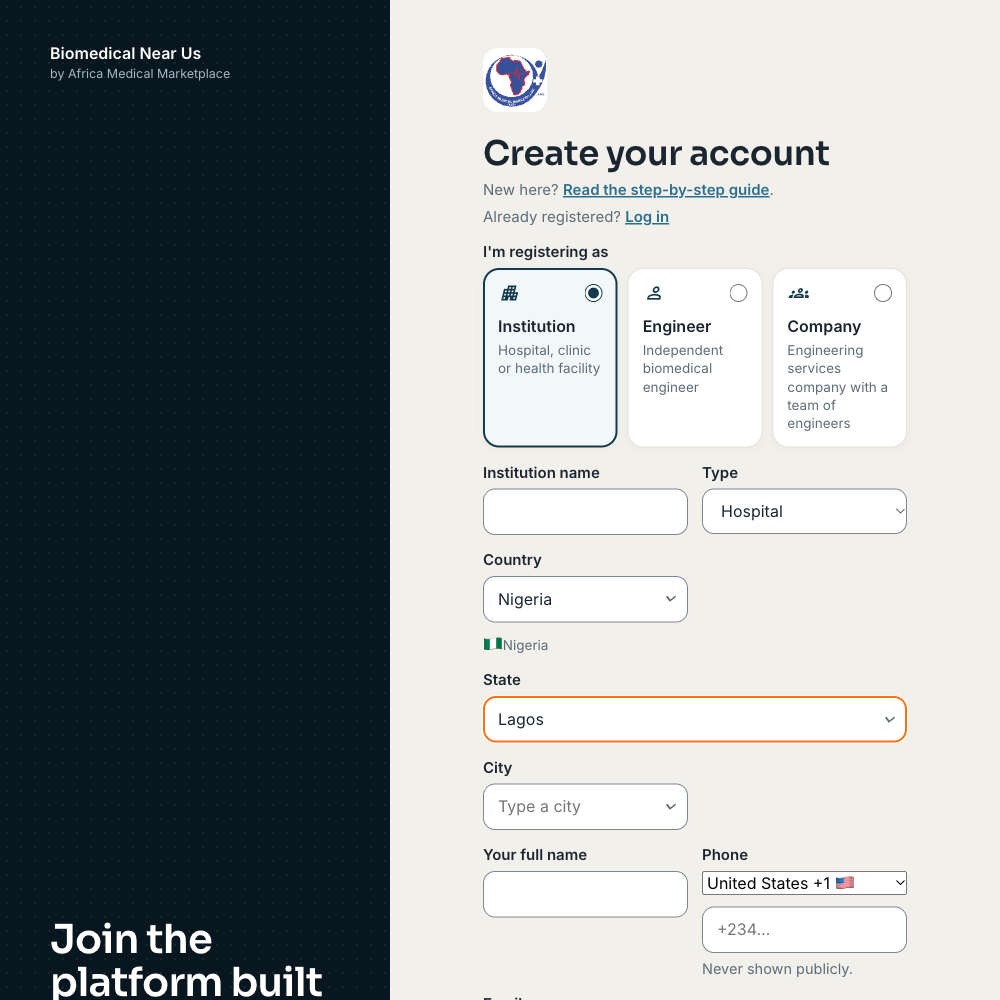
- Under I'm registering as, choose Engineer (Independent biomedical engineer).
- Choose your Country. A small flag appears under it to show that you chose correctly.
- If your country is Nigeria, choose your State from the list. It has all 36 states and the Federal Capital Territory (FCT). You can type the first letters to find yours.
- Choose or type your City.
- Write Your full name, your Phone and your Email.
- Choose a Password of at least 12 characters. Use Show to check what you typed.
- If someone gave you a Referral code, type it. If not, leave it empty.
- Tick I agree to the terms and privacy policy, then press Create account.
You now have an account. Your profile is saved, but it is not public yet. See the next step.
3. Your profile is checked before it is public
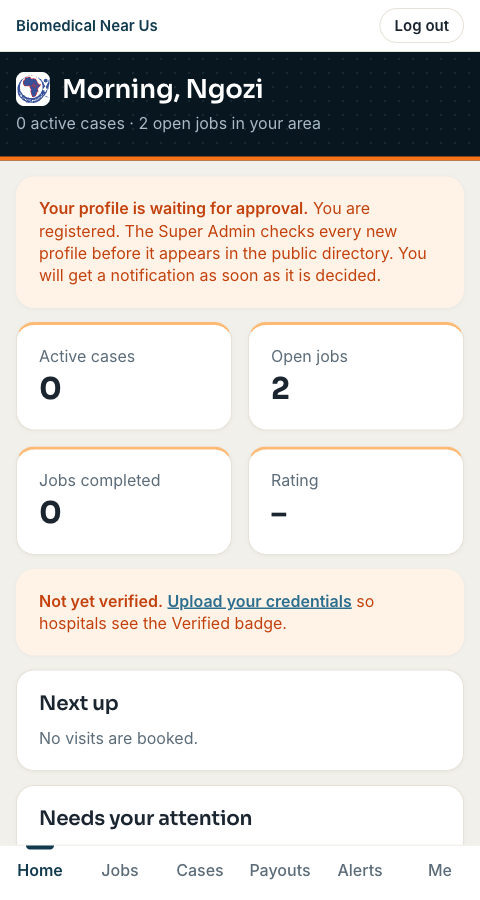
Signing up is not the same as being listed. The AMP team checks every new engineer profile first. On your home page you will see one of these messages:
- Your profile is waiting for approval.
- You are registered and the team has not decided yet. Nothing more is needed. You will get a notification under Alerts.
- More information is needed.
- The team asked you a question. Read the message, update your profile, then press Save. This sends it to the team again.
- Your profile was not approved.
- The message tells you why. Correct it and press Save to send it again.
- Your profile is public.
- Approved. Institutions can find you in the directory.
Approved, Verified and Subscriber are three different things. Approved means you may be public. Verified means the team checked your certificates. Subscriber means you pay for higher visibility.
4. Complete your profile
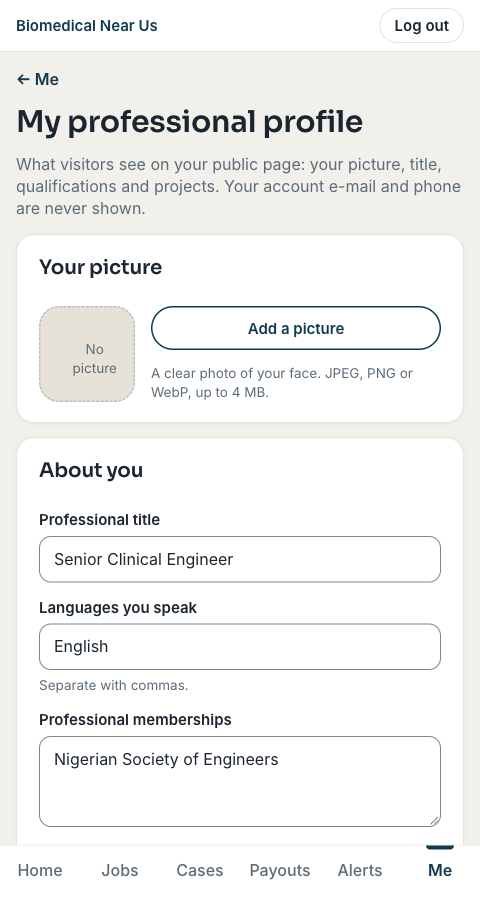
Press Me in the top menu.
- Write your short Bio. Under Specialties, tick every area of practice that fits you, for example clinical engineering, installation, maintenance and repair, testing and calibration, training, consultancy or rehabilitation engineering. Press Save.
- Open Professional profile, picture & projects.
- Press Add a picture and choose a clear photo of your face (JPEG, PNG or WebP, up to 4 MB).
- Write your Professional title, your Languages (separated by commas) and your Professional memberships (one per line).
- Press Add a qualification for each degree or course. Press Add a link for your LinkedIn or website.
- Contact details: leave Show a phone number or e-mail on my public page switched off unless you want everyone to see them. If you switch it on, type a work phone or address, not your private one.
- Press Save.
5. Your places and availability
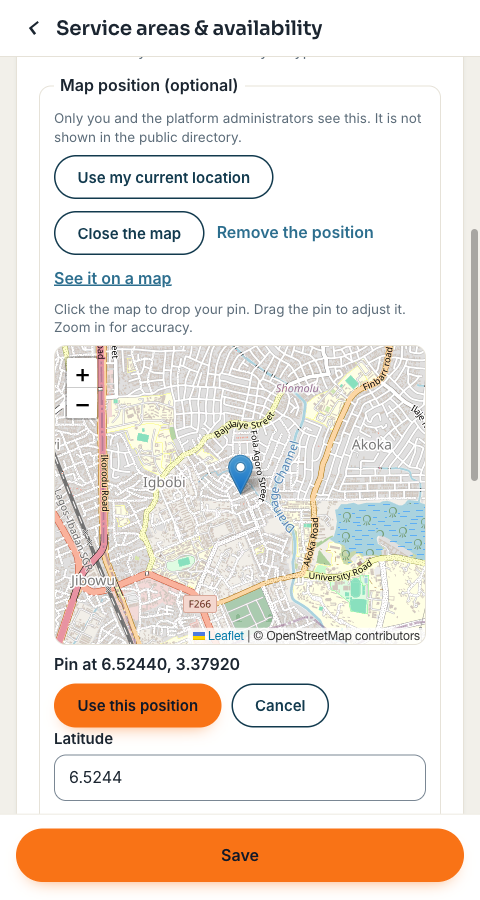
- Press Me, then Service areas & availability.
- Under Where you work, write your Base location and choose your Travel radius.
- Under When you're available, choose Working hours, On call or Off for each day, and press Save at the bottom.
- Under Your places, set where you are based: country, state, city. (Nigerian engineers: choose your state.)
- Optional: under Map position, press Use my current location (your phone asks you to allow it) or type the latitude and longitude. Only you and the platform administrators see this. You can press See it on a map to check it.
- Press Add another area for each other country, state or city where you can work. Leave the city empty to serve a whole state or country.
- Press Save places.
6. Upload your certificates
- Press Me, then Credentials.
- Under Add a certificate, write the Title and who it was Issued by, add the dates if you have them, and choose the File (PDF, JPG, PNG or WebP, up to 10 MB). Press Upload certificate.
- The team checks it. When it is approved your profile shows Verified. You do not pay for this.
7. Add your projects
- Press Me, then Professional profile, picture & projects, then Add a project.
- Write a title (for example "CT scanner installation"), what you did, the area of practice, where, the dates and your role. Press Save project.
- Under the project, press Add a picture (up to four).
- Projects appear on your public page once your profile is approved. If the team hides one, you are told why.
8. Free and paid visibility
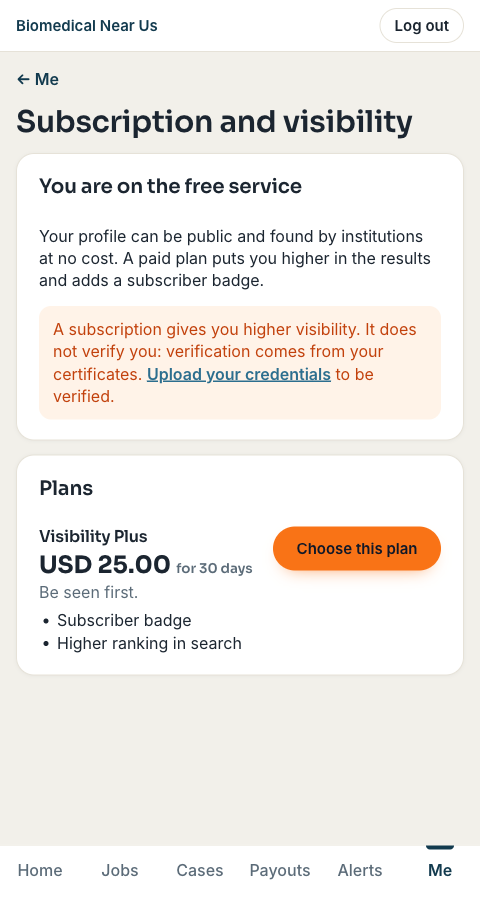
Free: you can be public, be found in the directory and add your profile and projects, at no cost.
Paid (Subscriber): your profile shows a ★ Subscriber badge and appears higher among the engineers that match a search, for example in your country or state. Search results are always sorted from the people who match what was searched.
- Press Me, then Subscription & visibility.
- Read the plans. The price and the number of days are shown. If there is no plan yet, the free service keeps working.
- Press Choose this plan. This is only a request. You are not a subscriber yet.
- The AMP team confirms your payment and switches your subscription on. You get a notification. The page then shows the date it ends.
- About 7 days before it ends you get a reminder. Press Renew with this plan. The new period starts when the old one ends, so you lose no days.
Paying does not make you Verified. Only your certificates do that. When a subscription ends, your profile stays public but loses the badge and the higher place.
9. Hospital enquiries and how your profile is doing
- Hospitals and clinics can write to you from your public page. Open Enquiries from hospitals in the Me menu. A small orange dot means something is new.
- Open an enquiry, write your answer and press Send reply. The hospital does not see your phone number or e-mail unless you chose to show them on your page.
- When the work is agreed or the question is finished, press Close this enquiry.
- On your home page the card Your profile shows how complete your profile is and the next step to take. It also shows how many people opened your profile and how many hospitals saved you.
A complete profile with a picture, projects and a certificate is found more often. Paying for a plan does not make you verified: verification is a separate check of your certificates.
10. Change your details later
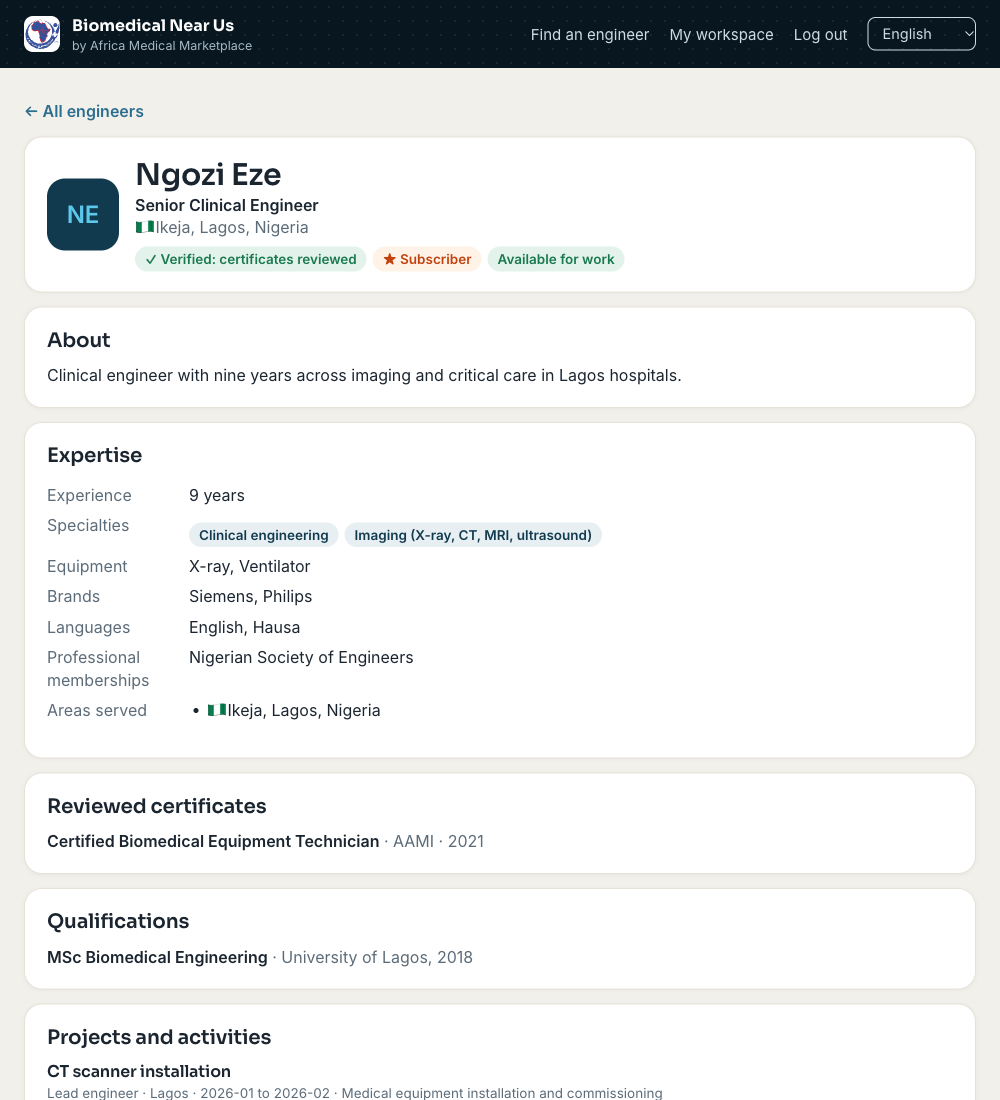
You can change your profile at any time from Me. Changes to an approved profile appear at once. If your profile was sent back or not approved, pressing Save sends it to the team again. To see your public page, press Me, then See my public page. To change your password or e-mail use Me, then Account settings.
Stuck? Read the questions and answers or contact support.